How to Put Together an Image from Clip Art: Step-by-Step
Quick answer: To put together an image from clip art, choose pieces with matching resolution and art style, open them in a layering tool like Canva or Photoshop, resize each element proportionally, align them on one canvas, adjust colors for consistency, then export as a PNG with a transparent background if you’ll be layering it into something else.
Whether you’re building a card, a classroom worksheet, or a piece of printable wall art, most clip art projects come down to the same core skill: combining clip art from separate elements into one clean, cohesive composition. Here’s how to do it without ending up with a mismatched, pixelated mess.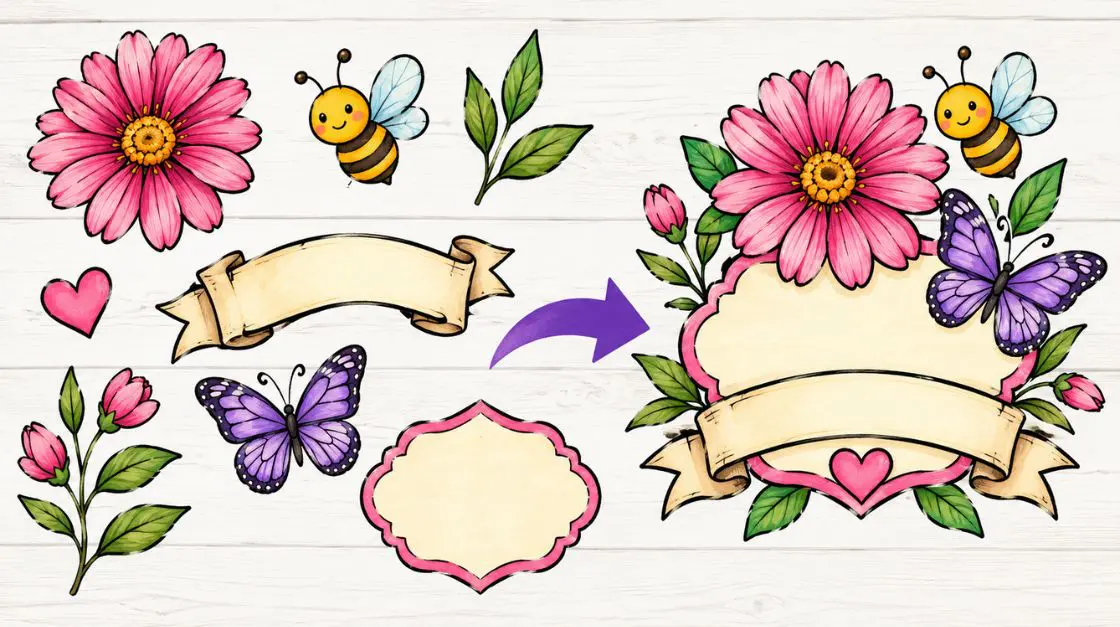
What Is Clip Art Composition, and Why Does Layering Clipart Matter?
Clip art composition is the finished result of arranging multiple clip art elements—a background, a focal illustration, and small accent pieces—into a single balanced image. Layering clipart is the technique that makes this possible: it lets you position, resize, and edit each element independently before merging everything into one final file. Get the layering right, and the composition looks intentional. Skip it, and even great individual clip art pieces end up looking pasted together.
How to Combine Clip Art in 6 Steps
Step 1: Choose Clip Art That Matches in Style and Resolution
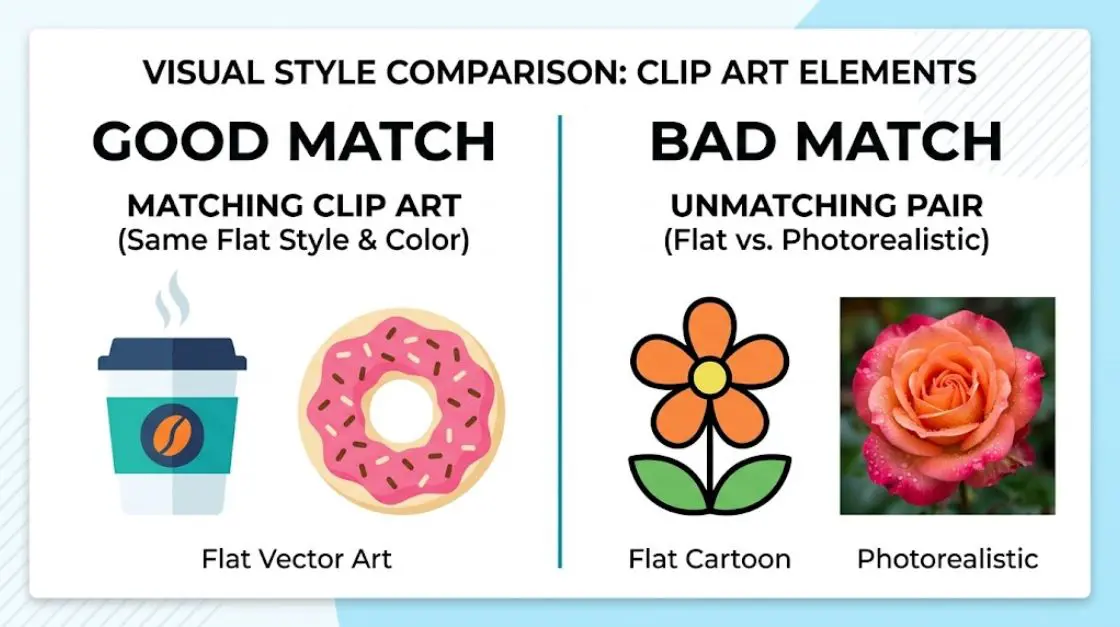
Before you open any software, pick your elements carefully. Mixing a flat vector-style illustration with a photorealistic clip art piece will look off no matter how well you layer them. Look for:
- The same art style — flat/cartoon, watercolor, or line-art, but not a mix
- Matching resolution — ideally 300 DPI for anything you plan to print
- A consistent color palette, or elements you’re willing to recolor to match
Step 2: Open a Layering Clipart Tool
You don’t need expensive software to start layering clipart. Options at every level:
- Free: Canva, GIMP
- Paid: Adobe Photoshop, Affinity Designer
All of these let you import multiple images onto separate layers —the key feature you need—so you can move, resize, and edit each piece independently without affecting the others.
Step 3: Layering Your Clip Art Elements
Import each clip art piece as its own layer, then arrange them in the order they should appear — background elements on the bottom, focal elements on top.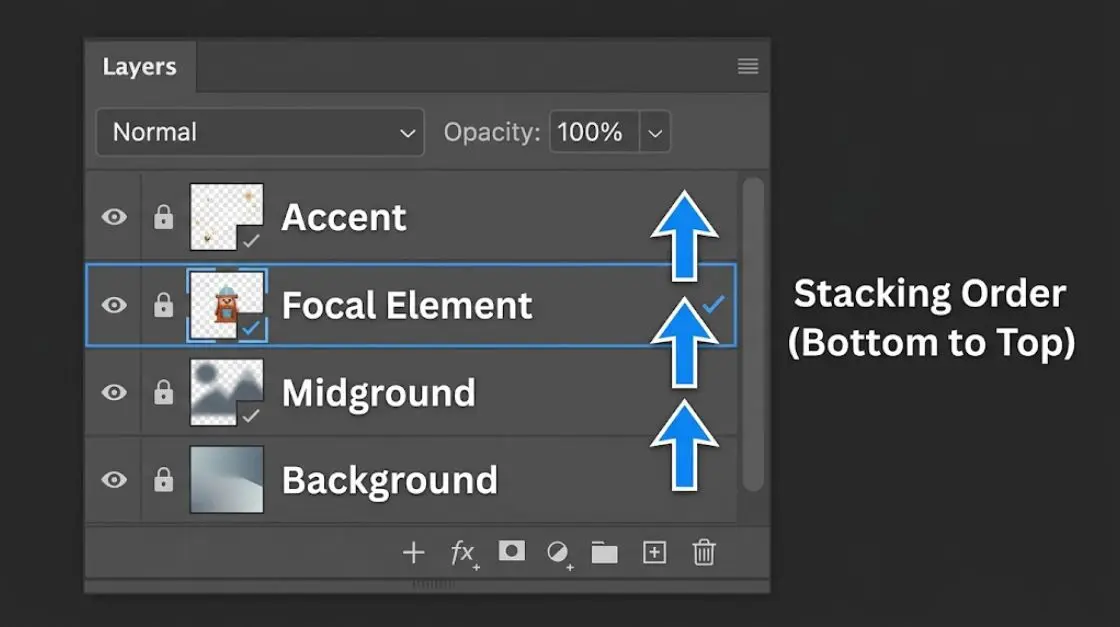
Most tools let you drag layers up or down in a side panel to reorder them. This is the core of clip art composition: stacking order turns separate pieces into one coherent image.
Step 4: Resize and Align for Clean Composition
Resize each element by dragging a corner handle, not an edge—this keeps the image proportional so nothing looks stretched or squashed.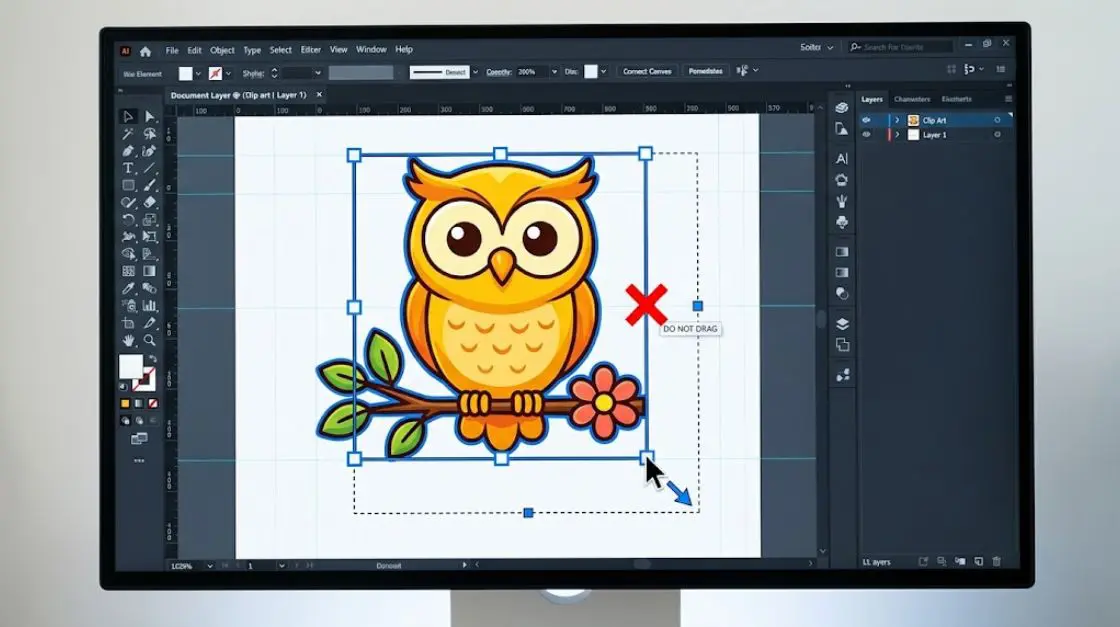
Use your tool’s alignment guides (most snap automatically) to center elements or line them up evenly along an edge.
Step 5: Adjust Colors for a Consistent Composition
If your elements came from different clip art sets, their colors may not quite match.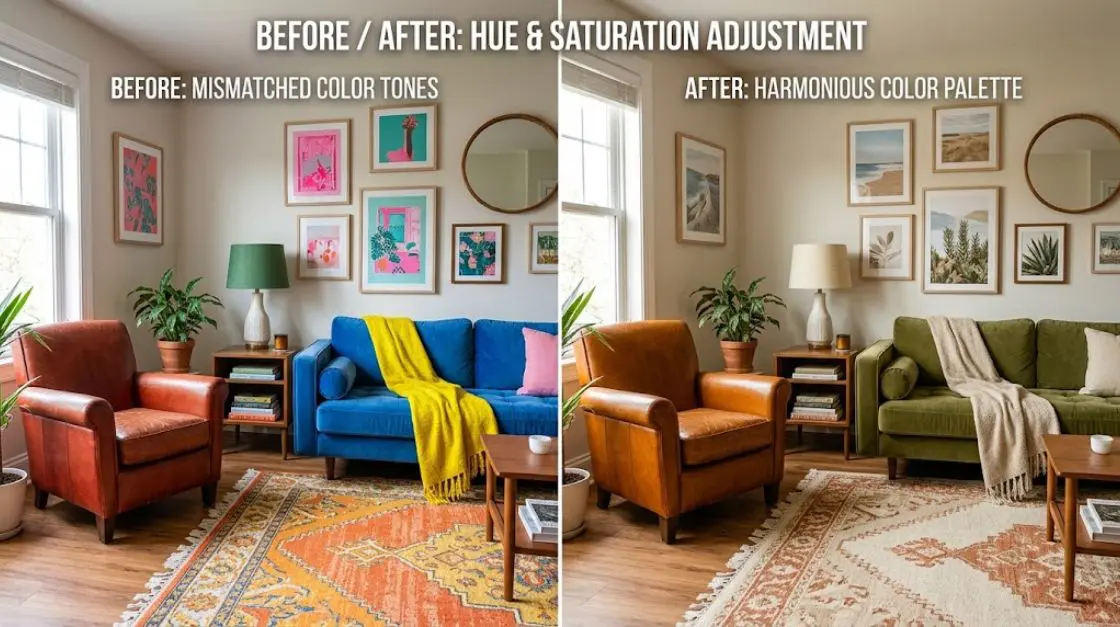
Use your tool’s hue/saturation or color-adjustment settings to bring everything into the same palette — this single step does more than anything else to make a combined image look intentional rather than assembled.
Step 6: Export Your Combined Clip Art Image
Once everything is arranged, export the finished image as a PNG, not a JPG — PNGs support transparency, so if you need to drop this combined image onto a card, worksheet, or wall art template later, the background won’t get in the way.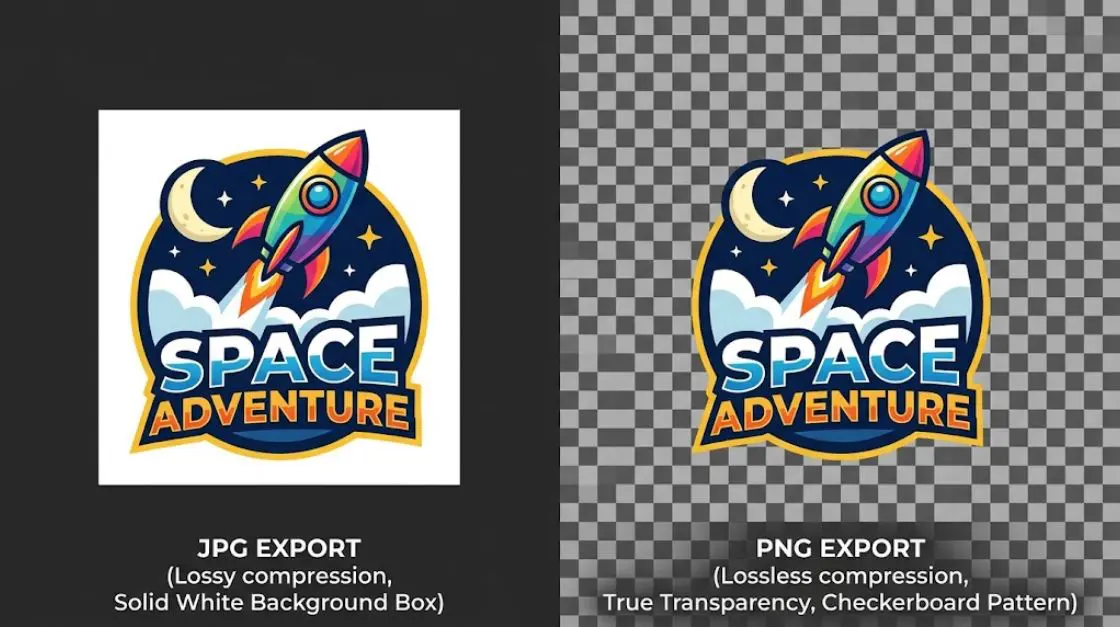
Common Mistakes When Combining Clip Art
- Mismatched resolution — combining a 72 DPI web image with a 300 DPI print-ready one will make part of your final image look blurry or pixelated next to the rest.
- Inconsistent art style — even great individual clip art pieces will look wrong together if their styles don’t match.
- Skipping the layering step — flattening elements too early makes it hard to fix alignment or color mistakes without starting over.
- Forgetting the transparent background — exporting as JPG bakes in a white (or colored) background, which limits how you can reuse the composition later.
Frequently Asked Questions About how to put together an image from clip art
Can I put clip art together using just my phone?
Yes — apps like Canva (mobile), PicsArt, or Adobe Express all support layers on phones and tablets. The core steps stay the same: import each element as its own layer, arrange the stacking order, then resize and align before exporting. Precision alignment is a bit trickier on a small screen, so zoom in before nudging pieces into place.
What’s the best free tool for layering clipart if I’m just starting out?
Canva is the easiest entry point — its drag-and-drop layers panel and built-in alignment guides do a lot of the work for you. GIMP is more powerful (closer to Photoshop) but has a steeper learning curve, so it’s better once you’re comfortable with layer basics.
Why does my exported image have a white box around it instead of a transparent background?
This almost always means you exported as a JPG instead of a PNG, or one of your source clip art files already had a solid background baked in. Check each layer before exporting — if an element still shows a white square behind it in your canvas, it wasn’t transparent to begin with, and combining it with transparent pieces won’t fix that.
Can I combine PNG and SVG clip art in the same image?
Yes, and it’s actually a good habit. SVGs are vector files, so you can resize them to any size without losing quality — useful if you want to scale a background element up. PNGs are fine for pieces you won’t need to resize dramatically, but if you’re building something for print, favor SVGs (or high-DPI PNGs) wherever possible.
How many clip art elements can I combine before it looks cluttered?
There’s no fixed number, but a good rule of thumb is one clear focal element, plus a handful of supporting pieces (2–5) that don’t compete with it. If you’re unsure whether a composition is too busy, step back and check whether your eye knows where to look first — if everything fights for attention, it’s time to remove or simplify an element.
Conclusion
Putting together an image from clip art comes down to six repeatable steps: matching your elements before you start, layering clipart in the right stacking order, resizing proportionally, adjusting colors for a consistent composition, and exporting with a transparent background. Skip any one of these steps — especially layering or color matching — and even great individual pieces end up looking mismatched rather than intentional. Once you’ve combined clip art a few times, the whole process takes just minutes. For more on sourcing and licensing your elements, revisit our complete clip art guide, or browse our print-ready collections to start your next composition today.
Related Reading on Layering Clipart and Composition
For a broader look at sourcing, licensing, and using clip art the right way, see our complete guide: How to Use Clipart: Complete Buying & Usage Guide.
Looking for ready-to-combine clip art sets? Browse our flower clipart, camera clipart, characters clipart, and barbecue clipart collections — all delivered as print-ready 300 DPI PDFs.