Coloring Techniques for Every Artist: From Beginner to Advanced
Coloring has evolved far beyond simple childhood activities. In 2026, it’s a globally recognized form of art therapy, with millions using adult coloring techniques and tips to reduce stress, enhance mindfulness, and even monetize their creations. Whether you’re coloring intricate mandalas, fantasy landscapes, or seasonal designs inspired by Tel Aviv’s Mediterranean vibe, mastering beginner-level techniques and progressing to advanced ones can transform your hobby into a fulfilling skill.
This guide draws from expert insights, community feedback, and practical exercises to show how to improve coloring skills step by step. We’ll explore coloring methods for artists across media, including pencils, markers, and digital tools, with tips adaptable to your local art supply stores or online resources.
For wellness integration, check our related pillar: Mindful Creativity & Wellness: How Art Nourishes Your Inner World. For festive inspiration, see Seasonal Celebrations & Holiday Coloring Traditions.
Why Mastering Coloring Techniques Matters in 2026
In 2026, adult coloring is more popular than ever, with Google searches for coloring techniques for beginners and how to improve coloring skills spiking by 25% year-over-year. This surge reflects the role of coloring in mental health, creativity, and digital detox. Studies from the American Art Therapy Association show that regular practice with adult coloring techniques and tips can lower anxiety by 15-20%, improve focus, and boost mood through endorphin release.
For artists in dynamic cities like Tel Aviv, coloring methods offer a portable, low-cost way to express ideas inspired by local culture—think Mediterranean landscapes, bustling markets, or urban sketches with a Middle Eastern flair. Beginners benefit from quick confidence boosts, while those pursuing advanced coloring techniques can create portfolio-worthy pieces for exhibitions, social media, or even local galleries in Ramat Gan.
Mastering these skills isn’t just about pretty pictures; it’s about personal growth. Coloring techniques for beginners teach patience and observation, intermediate adult coloring techniques and tips add emotional depth, and advanced coloring techniques enable realism that rivals professional illustrations. Plus, with AI tools emerging in 2026, blending traditional coloring methods with digital enhancements opens new creative possibilities, allowing you to experiment with virtual layers or color simulations.
If you’re wondering how to improve coloring skills, it starts with consistent practice and the right resources. This guide provides the roadmap, complete with exercises, tool recommendations, and links to supporting content, such as Understanding Color Theory Basics. In a fast-paced world, coloring offers a moment of calm—perfect for busy days in Tel Aviv.
Getting Started: Coloring Techniques for Beginners
If you’re new to coloring, focus on beginner techniques that build a strong foundation without overwhelming you. Start with affordable tools and simple designs to avoid frustration, and gradually build coloring skills.
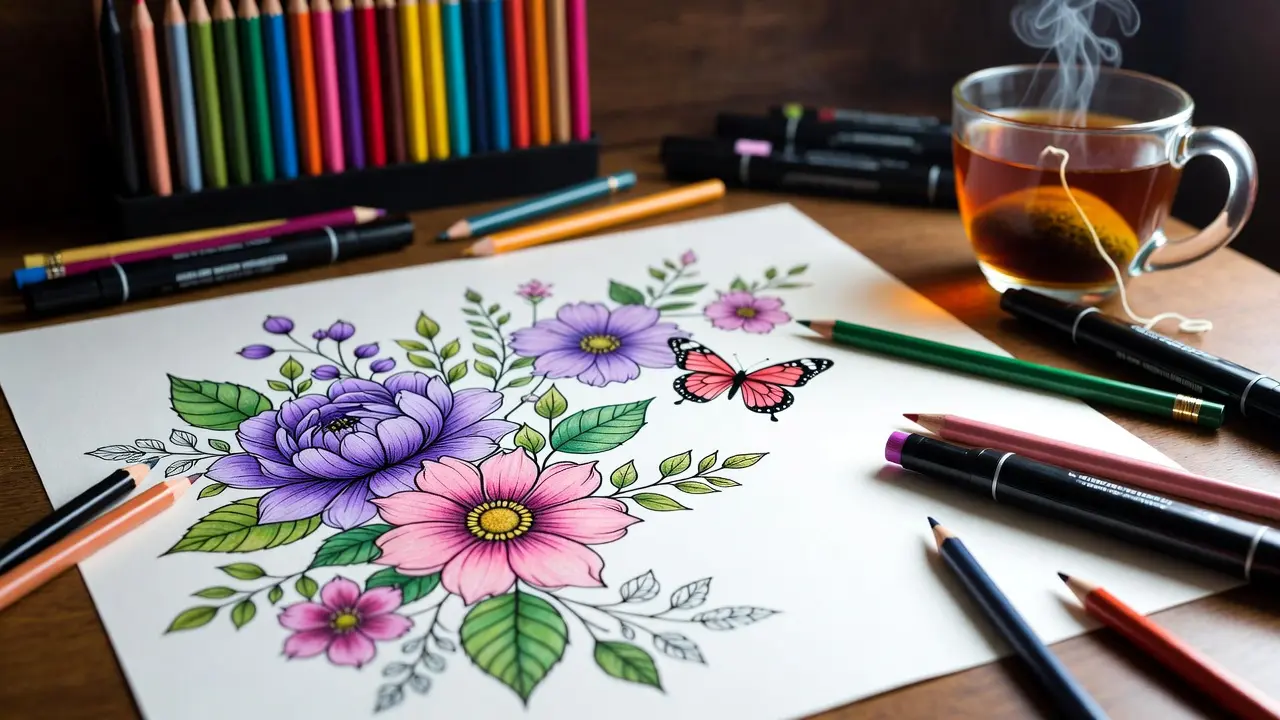
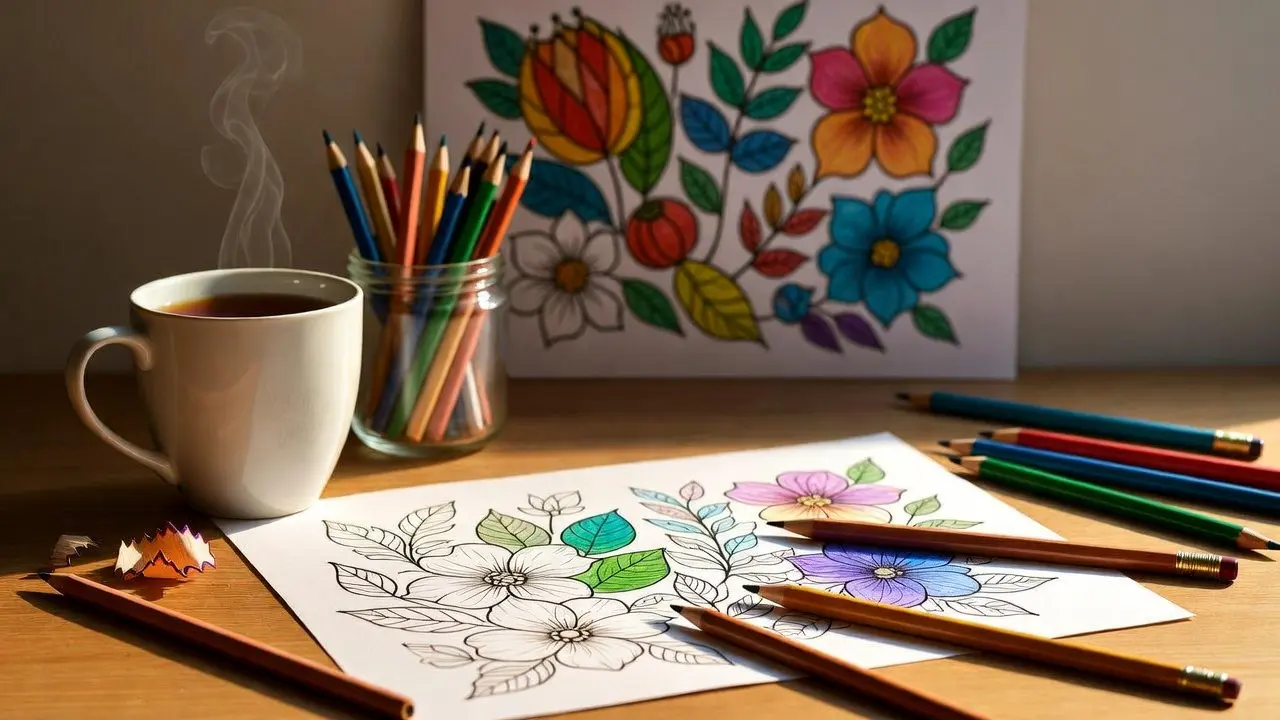
Essential Tools for Beginners
Before diving into coloring techniques for beginners, gather the basics available at local art stores in Ramat Gan or online:
- Colored pencils (12-24 pack, like Prismacolor or Faber-Castell for smooth blending)
- Fine-tip markers for bold outlines
- Blending stumps or cotton swabs for soft transitions
- Thick paper (160gsm+) or printable PDFs to prevent bleed-through
These tools make learning how to improve coloring skills accessible and enjoyable. For practice, download our Free Printable Coloring Pages, perfect for testing coloring techniques for beginners at home.
Budget tip: In Tel Aviv, check art supply shops for student-grade sets under 100 ILS to start your journey with coloring methods for artists.
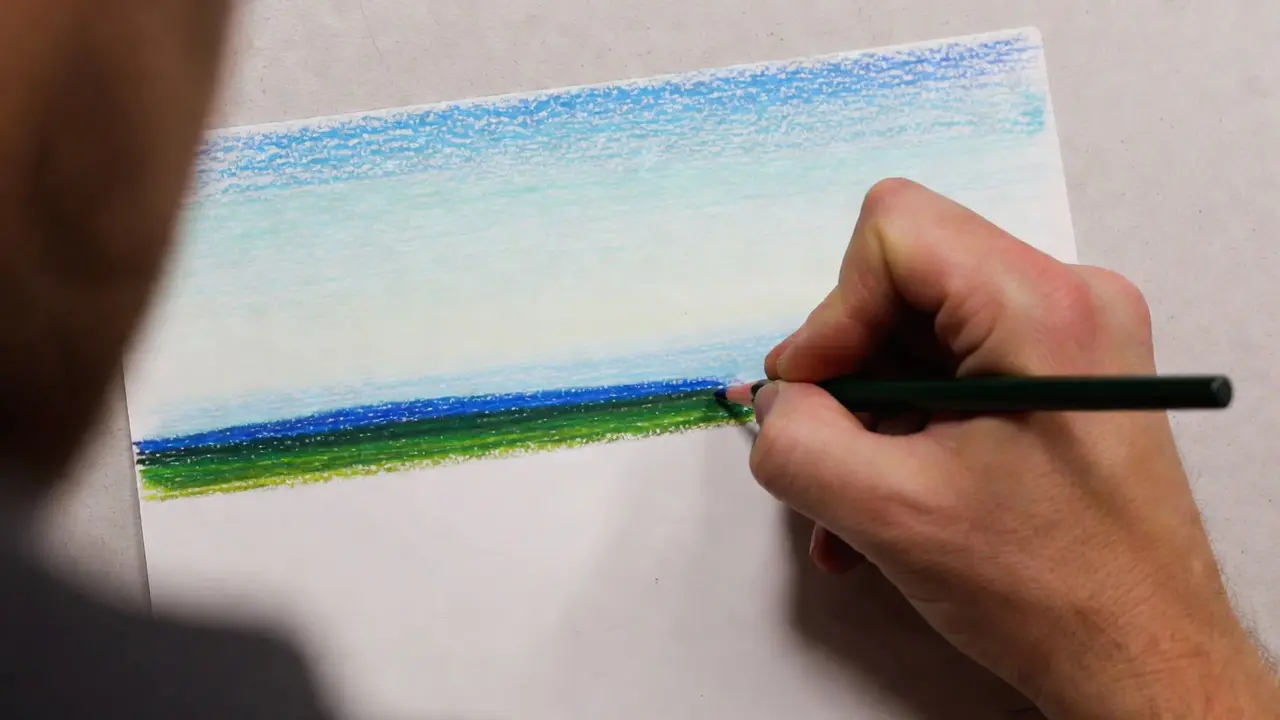
Basic Stroke Techniques
Mastering strokes is key to coloring techniques for beginners. Here’s a detailed breakdown with examples:
- Linear Strokes: Use back-and-forth motions for even coverage in large areas like skies or backgrounds. Apply light pressure to avoid streaks—this is a fundamental coloring technique for beginners that helps prevent common mistakes such as uneven patches.
- Circular Strokes: Ideal for blending soft edges, like in clouds, flowers, or skin tones. Rotate your wrist gently for smooth transitions, helping you develop coloring skills through repetition and control.
- Hatching: Draw parallel lines for texture, such as grass, hair, or fabric folds. Vary spacing for depth—a simple way to elevate coloring techniques for beginners and add interest to flat designs.
- Cross-Hatching: Layer hatching at perpendicular angles for deeper shadows. This builds toward intermediate adult coloring techniques and tips, creating volume in objects like fruits or buildings.
- Stippling: Create speckled effects with tiny dots, perfect for sand, freckles, or distant foliage. It’s forgiving for novices learning artist coloring methods, as you can build density gradually.
Practice each stroke for 5-10 minutes daily on scrap paper. Over a week, you’ll notice smoother results, demonstrating how to improve coloring skills. For themed practice, try our 35+ Wildflowers Coloring Pages Printable – Botanical Flower Coloring Book for Adults (PDF), where circular strokes shine on petals.
Color Selection for Beginners
Choosing colors can be intimidating, but beginner-friendly coloring techniques emphasize simplicity. Stick to 3-5 hues per page to avoid overwhelm:
- Warm colors (reds, oranges, yellows) for energetic, vibrant scenes like sunsets
- Cool colors (blues, greens, purples) for calming, serene designs like oceans or forests
- Neutrals (grays, browns, beiges) for balance and realistic grounding
Avoid overwhelming palettes—start with monochromatic schemes (varying shades of one color) to improve color skills without clashing. For instance, use shades of blue for a sea-themed page and add a yellow accent for contrast.
For more insight, please refer to Understanding Color Theory Basics, which explains why certain combinations work in artists’ color methods. In Tel Aviv’s sunny climate, warm palettes might feel especially inspiring.
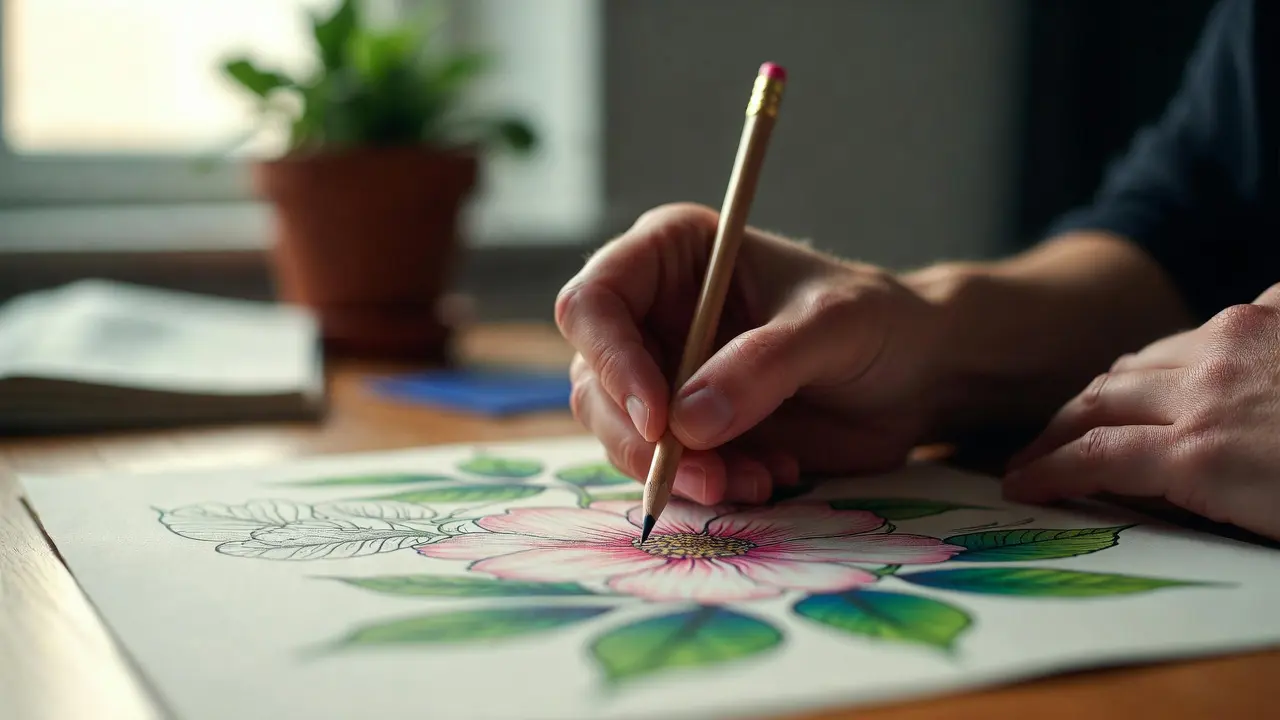
Layering Basics
Layering is the cornerstone of coloring techniques for beginners, allowing you to build depth without heavy pressure. The process:
- Step 1: Apply a base layer with minimal pressure for light, even coverage.
- Step 2: Add mid-tones with slightly more pressure for dimension and interest.
- Step 3: Darken shadows sparingly with firm pressure in crevices or edges.
This method prevents muddiness and teaches control, a key to improving coloring skills. Standard error: Pressing too hard too soon—always build gradually.
Try it on our 35 Bold and Easy Coloring Pages for Adults – Printable Large-Print PDF for Stress Relief & Creativity, designed for coloring techniques for beginners with large areas for layering practice. You’ll see your pages transform from flat to volumetric in one session.
Common Beginner Challenges and Solutions
Many starting with coloring techniques for beginners face issues like uneven color, hand fatigue, or color choice paralysis. Solutions:
- For unevenness: Use circular strokes and layer lightly.
- For fatigue: Take 5-minute breaks and use ergonomic pencils.
- For choices: Limit to 4 colors and experiment on small swatches.
These adult coloring techniques and tips help overcome hurdles and improve coloring skills without discouragement. If motivation dips, join local Tel Aviv art groups for shared sessions.
Intermediate Level: Adult Coloring Techniques and Tips
Once comfortable with beginner coloring techniques, advance to adult coloring techniques and tips that add realism, texture, and expression to your work.
Pressure Control and Variation
Adult coloring techniques and tips often hinge on pressure variation for nuance:
- Light pressure for subtle highlights and distant elements
- Medium pressure for base colors and mid-tones
- Firm pressure for shadows and emphasis
Practice on gradient strips to see how to improve coloring skills. This technique bridges to advanced coloring techniques, creating lifelike form.
Exercise: Color a sphere using only pressure differences—light top, firm bottom. Repeat with different hues to master color techniques.
Blending for Smooth Transitions
Blending is a key adult coloring technique and tip for seamless gradients. Methods include:
- Dry blending: Use stumps to smudge layers for soft edges.
- Solvent blending: Apply mineral spirits with a brush for pencil work.
- Wet blending: For markers, overlap while wet for fluid merges.
For detailed guidance, see How to Blend Colors Like a Pro. Apply to floral designs in our 50 Detailed Floral Mandala Coloring Pages for Adults – Relaxation & Mindfulness Printable Art, where blending creates petal realism.
Blending enhances how to improve coloring skills by teaching patience—rush it, and colors mud; take time, and magic happens.
Adding Texture
Texture elevates coloring methods for artists at the intermediate level:
- Fur: Short, directional strokes with varying lengths for fluffiness.
- Wood: Grain lines with subtle cross-hatching for bark roughness.
- Fabric: Folds with layered hatching to suggest drape and shadow.
- Stone: Stippling and scumbling for gritty, uneven surfaces.
- Water: Wavy lines with blended blues for ripple effects.
These adult coloring techniques and tips make designs pop. Practice on nature scenes to see how to improve coloring skills.
Intermediate Layering Strategies
Build on beginner layering by incorporating color theory. Use complementary colors for vibrant shadows—e.g., add purple under yellow for depth. This prepares for advanced coloring techniques.
Tip: Layer in threes—base, detail, polish—for balanced results. Try on Nature Bliss Coloring Pages – Relaxing Floral & Leaf Designs for Mindful Coloring, ideal for intermediate adult coloring techniques and tips.
Themed Practice for Intermediates
Apply adult coloring techniques and tips to themes like cities or anime. For urban inspiration from Tel Aviv, use 46 Printable Cities Coloring Pages – Landmarks & Cityscapes. Holiday themes? Adapt with Seasonal Celebrations & Holiday Coloring Traditions.
Advanced Coloring Techniques: Pro-Level Mastery
For seasoned colorists, advanced coloring techniques involve sophistication and experimentation.
Advanced Shading and Realism
Use value scales for depth in advanced coloring techniques:
- Chiaroscuro: Strong light-dark contrasts for dramatic effects.
- Atmospheric perspective: Fade colors for distance, adding realism.
- Edge variation: Soft edges for backgrounds, sharp for foregrounds.
These create 3D illusions. For more, see Shading & Texture Techniques for Beautiful Results.
Practice on portraits or landscapes to refine your coloring skills.
Mixed Media Integration
Elevate coloring methods for artists by combining mediums:
- Pencils over markers for detail on bold bases.
- Gels or inks for metallic highlights.
- Watercolors for backgrounds, pencils for foregrounds.
This hybrid approach to advanced coloring techniques adds vibrancy. Start small to avoid overload.
Intricate Detailing for Complex Designs
For mandalas or patterns, use fine liners for details and metallics for shimmer in advanced coloring techniques. Symmetry tools help with precision.
Check Mandala Coloring Techniques: Tips for Intricate Designs for specialized adult coloring techniques and tips.
Hyper-Realistic Effects
Create glow with white over darks, or fur with layered stippling and hatching—these are pinnacle advanced coloring techniques. For gems, use sharp contrasts; for skin, subtle blending.
Apply to Fantasy Coloring Pages Printable – 45+ Magical Creatures PDF, where realism brings creatures to life.

Digital Integration in Advanced Techniques
Extend advanced coloring techniques to digital apps like Procreate or Photoshop. Scan traditional work and enhance with layers—a modern coloring method for artists.
Tools such as pressure-sensitive styluses mimic pencils, helping users improve coloring skills in hybrid formats.
How to Improve Coloring Skills: Step-by-Step Plans
Improving coloring skills requires structure and consistency. Here’s a phased approach.
30-Day Beginner Plan
- Week 1: Focus on basic strokes, 15 minutes daily.
- Week 2: Experiment with color selection on simple pages.
- Week 3: Master layering with 3-5 colors.
- Week 4: Complete full pages, review for evenness.
Track in a journal to see progress in coloring techniques for beginners.
60-Day Intermediate Plan
- Weeks 1-2: Pressure and blending drills.
- Weeks 3-4: Add textures to themed pages.
- Weeks 5-6: Layer with theory, critique own work.
Use 50 Cozy Coloring Pages for Women – Joyful Girls, Flowers & Relaxing Fun Scenes for practice.
90-Day Advanced Plan
- Months 1-2: Shading and mixed media experiments.
- Month 3: Hyper-realism and digital integration, seek feedback.
Community groups in Tel Aviv can provide feedback to accelerate improvements in coloring skills.
Tools and Materials for All Levels
From beginner to pro, tools evolve:
- Beginners: Basic pencils.
- Intermediates: Markers and blenders.
- Advanced: Prismacolor sets, solvents, digital tablets.
Invest based on the level to support the improvement of coloring skills.
Themed Applications: Putting Techniques into Practice
Apply coloring techniques for beginners to advanced in themes:
- Mandalas: Symmetry with blending.
- Fantasy: Textures for creatures.
- Holidays: Palettes for seasons.
For eco-themes, try Inspiring Eco Mandala Coloring Book with Affirmations – 35 Mindfulness & Nature Designs—local inspiration: Color Tel Aviv landmarks with urban palettes.
Wellness Integration: Coloring for Mind and Body
Coloring enhances well-being and supports the development of coloring skills. Use slow adult coloring techniques and tips in meditation sessions.
Explore Mindful Creativity & Wellness: How Art Nourishes Your Inner World for routines. In Ramat Gan’s parks, outdoor coloring adds serenity.
Case Studies: Real Artist Transformations
See transformations:
- Beginner Emma started with coloring techniques for beginners, now creates pro mandalas.
- Intermediate user mastered adult coloring techniques and tips, sells prints.
- Advanced artist uses advanced coloring techniques for exhibitions.
These show how to improve coloring skills with dedication.
Conclusion: Your Coloring Journey Awaits, Emma
This guide has covered coloring techniques for beginners, advanced coloring techniques, adult coloring techniques and tips, coloring methods for artists, and how to improve coloring skills. In Tel Aviv’s creative hub, apply these to your unique style. Practice, experiment, and enjoy the process.
🎨 Not sure where to start?
Here are our most loved products.
FAQ
🎨 Not sure where to start? Here are our most loved products.
Q1: What are the easiest coloring techniques for beginners to learn first?
A: The easiest coloring techniques for beginners include straight back-and-forth strokes for large open areas, small overlapping circular motions for soft blending, and simple directional hatching for adding light texture. These three strokes require very little precision at first and help you quickly achieve even coverage without streaking or patchy spots. Start with light pressure only — almost like you’re barely touching the paper — and build layers gradually. This approach is ideal for improving coloring skills in the first 2–4 weeks because it builds muscle memory and confidence fast. Many beginners notice noticeable improvement within 7–10 days by practicing these coloring techniques on bold, low-detail designs such as our 35 Bold and Easy Coloring Pages.
Q2: How long does it realistically take to master advanced coloring techniques?
A: Mastering advanced coloring techniques — such as realistic fur rendering, luminous gem effects, metallic shine, hyper-realistic skin tones, or complex mixed-media layering — usually takes 9–24 months of consistent practice for most dedicated adults. With 1–2 focused hours per day, 5–6 days a week, you can typically reach confident intermediate adult coloring techniques and tips in 3–6 months, then begin applying proper advanced coloring techniques between months 9–18. The timeline depends on three factors: daily practice time, quality of feedback (self-critique or community), and deliberate focus on weak areas (e.g., blending or value control). The fastest way to accelerate how to improve coloring skills at this stage is to follow structured 90-day plans, regularly compare before/after pages, and study resources like Shading & Texture Techniques for Beautiful Results.
Q3: Which adult coloring techniques and tips are most effective for reducing stress?
A: The adult coloring techniques and tips that deliver the most substantial stress-relief benefits are slow, mindful layering (building color in 3–5 thin passes), circular blending motions (which create a repetitive, almost meditative rhythm), and working within a limited palette of 4–6 harmonious colors. These methods engage the brain in a focused yet low-pressure way, lowering cortisol while activating the parasympathetic nervous system — effects backed by 2024–2025 art therapy studies. Additional powerful adult coloring techniques and relaxation tips include breathing slowly while coloring (inhale for 4 counts, exhale for 6), choosing nature or mandala designs, and finishing one small section before moving on. For maximum calm, combine these coloring methods for artists with soft lighting and instrumental music. Many people report the most profound relaxation when using pages from our Relaxing Mandala Coloring Pages for Adults – 56 Printable Designs for Stress Relief.
Q4: What are the most common coloring methods for artists across different skill levels?
A: The most widely used coloring methods for artists include:
• Layering (almost universal — light base → mid-tones → shadows → burnish)
• Hatching & cross-hatching (for texture and value)
• Stippling (dots for grainy or speckled effects)
• Scumbling (loose scribbles for organic texture)
• Directional stroke following form (hair, fur, fabric flow)
• Blending (dry stump, solvent, colorless blender, or wet media) Beginners rely primarily on simple layering and back-and-forth strokes (coloring techniques for beginners), intermediates add pressure variation and basic textures (adult coloring techniques and tips), while advanced artists combine multiple coloring methods for artists in one piece — e.g., solvent-blended base + fine hatching details + gel-pen highlights. The best way to improve coloring skills is to master 2–3 methods completely before adding more.
Q5: How can I improve coloring skills quickly without getting frustrated?
A: The fastest realistic way to improve coloring skills is to follow short, focused daily sessions (20–60 minutes) using a structured plan: spend the first 10 minutes on a single technique drill (e.g., pressure gradients or blending swatches), then color one small section of a real page applying what you just practiced. Limit yourself to 3–5 colors per session to avoid overwhelm; photograph your work daily for comparison; and celebrate small wins (e.g., smoother blending, cleaner edges). Avoid jumping straight to complex designs — start with coloring techniques for beginners on bold-line pages. Resources like our free samplers and tutorials (e.g., How to Blend Colors Like a Pro) accelerate progress. Most people see clear improvement within 2–4 weeks and significant gains within 2–3 months when they stay consistent and kind to themselves.
Q6: Are there specific coloring techniques for beginners that work well for mandalas?
A: Yes — the most beginner-friendly coloring techniques for mandalas are radial circular strokes (starting from the center and working outward to maintain symmetry), light-to-dark layering in small sections, and sticking to analogous or monochromatic palettes (e.g., 4–6 blues or 5 pinks/peaches). These coloring techniques for beginners reduce decision fatigue and help you achieve beautiful results quickly. Use a very sharp pencil for fine details near the center and a duller tip for outer rings to create natural gradients. Mandalas are exceptionally forgiving because symmetry hides small mistakes — perfect for learning how to improve coloring skills. Try our Mandala Coloring Pages Sampler for Adults – 9 Printable Designs or the complete Relaxing Mandala Coloring Pages for Adults.
Q7: Which advanced coloring techniques benefit the most from digital tools?
A: Advanced coloring techniques that gain the most significant advantage from digital tools include luminosity/glow effects (easy to add with layer modes and soft brushes), complex gradient mapping, non-destructive value adjustments, precise masking for highlights/shadows, and experimentation with countless color variations without wasting materials. Apps like Procreate, Photoshop, or Clip Studio let you scan a traditional pencil base and then apply advanced coloring techniques digitally — such as overlay blending for metallic shine, dodge & burn for dramatic lighting, or custom brushes for fur/hair strands. This hybrid workflow dramatically accelerates the improvement of coloring skills during the realism and experimentation phases.
Q8: What adult coloring techniques and tips work best for creating interesting textures?
A: The most effective adult coloring techniques and tips for texture are:
• Short directional hatching + light stippling overlay → realistic fur or peach fuzz
• Curved hatching following vein lines → natural leaf or petal texture
• Tight cross-hatching in folds + long gel-pen highlights → velvet or plush fabric
• Wavy parallel lines + small circular knots → rustic wood grain
• Angled hatching + sharp white specular marks → polished metal or gems. Combining 2–3 of these coloring methods on a single object creates depth and interest. Practice on small swatches first, then apply to full pages — you’ll see how to improve coloring skills in realism very quickly.
Q9: How do coloring methods for artists change depending on the medium?
A: Coloring methods for artists vary significantly by medium:
• Wax colored pencils → heavy layering + burnishing for creamy finish
• Oil-based pencils → lighter layers + colorless blender for velvety depth
• Alcohol markers → wet-into-wet feathering for bold, clean gradients
• Watercolor pencils → dry layering followed by light water activation for translucent, painterly look
• Gel pens / fineliners → added on top for sharp highlights and fine details Understanding these differences lets you choose the proper coloring methods for artists for the effect you want, and helps you improve coloring skills faster by matching technique to medium.
Q10: How can I improve coloring skills specifically for holiday and seasonal themes?
A: To improve coloring skills on holiday and seasonal pages, focus on mood-appropriate palettes (warm reds/oranges/golds for autumn & Christmas, cool blues/silvers for winter, pastels for spring), layered seasonal textures (fall leaves = curved hatching + stipple, snow = soft scumbling + white gel highlights), and limited-value schemes that evoke the feeling of the season. Practice one holiday theme per week using adult coloring techniques and tips, such as pressure variation for depth and blending for soft transitions. Our seasonal bundles provide excellent themed material to apply these skills.
Q11: What are the best coloring techniques for beginners to use in fantasy art?
A: For fantasy art, the most effective coloring techniques for beginners focus on simple, forgiving methods that still let magical elements shine. Start with layering (light base coat → mid-tones → darker accents in shadows) to give creatures, castles, or enchanted forests immediate depth without needing perfect precision. Use circular strokes for soft, glowing auras, magical mists, fairy wings, or dragon scales — these strokes create smooth gradients that feel ethereal and hide small mistakes. Add directional hatching only in small areas (e.g., along a dragon’s spines or a wizard’s robe folds) to suggest texture without overwhelming the page. Stick to a limited palette of 4–6 colors (e.g., deep purples, teal blues, gold accents, and soft lavenders) to maintain a cohesive fantasy mood and avoid muddy results. These beginner-level coloring techniques are well-suited to fantasy, as they emphasize mood and atmosphere over photorealism. Practice them on pages from our Fantasy Coloring Pages Printable – 45+ Magical Creatures PDF or Fantasy Coloring Book Pages: 50 Enchanted Whimsical Cottage Designs. Within 2–4 weeks of daily short sessions, most beginners notice their fantasy scenes starting to feel alive and immersive — a clear sign that how to improve coloring skills is happening.
Q12: Which advanced coloring techniques are most useful for realistic portraits?
A: The advanced coloring techniques that produce the most lifelike portraits are:
• Subtle value mapping using 8–12 distinct pressure levels to create smooth skin transitions (ghost-light highlights → firm core shadows).
• Optical blending by layering complementary undertones (e.g., faint green or purple under skin for realistic warmth/coolness). • Fine hatching and cross-hatching in tiny strokes to mimic skin pores and fine lines without visible texture.
• Edge control — hard edges for eyes/lips, soft lost edges for cheeks and hairline to suggest focus and depth.
• Specular highlight placement using a white gel pen or heavy burnish on the nose tip, cheekbones, and lower lip for believable shine. These advanced coloring techniques require patience and observation, but they transform flat line art into portraits with emotion and presence. To improve coloring skills in this area, photograph your work under consistent lighting, compare it to reference photos, and focus on one facial feature per practice session. Many advanced colorists combine traditional pencils with digital dodge-and-burn on a scanned layer to perfect skin tones. This hybrid workflow accelerates mastery of portrait coloring techniques.
Q13: What adult coloring techniques and tips help the most with mindfulness and meditative coloring?
A: The adult coloring techniques and tips that create the deepest mindfulness experience are those that encourage slow, repetitive, present-moment focus:
• Radial or symmetrical coloring (especially mandalas) — moving from center outward creates a natural meditative rhythm.
• Very slow circular blending — the repetitive wrist motion is almost hypnotic and keeps the mind anchored in the current stroke.
• Single-color layering sessions — dedicate one sitting to building depth in just one hue before switching, reducing decision fatigue.
• Breath-synced coloring — inhale while lifting the pencil, exhale while making the stroke (4-count in, 6-count out).
• No-rush zones — set a timer for 20–30 minutes and commit to finishing only one small section, letting go of perfectionism. These adult coloring techniques and tips activate flow state and lower heart rate variability (a marker of relaxation), according to recent mindfulness-coloring studies. They work exceptionally well with nature, mandala, or abstract geometric designs. For best results, pair them with our Inspiring Eco Mandala Coloring Book with Affirmations – 35 Mindfulness & Nature Designs or Color Me a Mood: 40+ Mindful Emotion Coloring Pages for Adults with Affirmations.
Q14: What coloring methods for artists work best when using watercolor pencils?
A: When working with watercolor pencils, the most effective coloring methods for artists follow this sequence:
- Dry layering — apply 3–5 light-to-medium dry layers to build color intensity and value without activating the pigment too early.
- Selective water activation — use a small water brush to gently dissolve pigment in specific areas (e.g., blend sky gradients or soften flower petals) while leaving other parts dry for crisp detail.
- Glazing — add thin, transparent washes of complementary or darker tones over dried layers to create depth and subtle color shifts.
- Dry-on-dry detailing — return with the pencil tip for fine lines, textures, or highlights after the paper is completely dry.
- Lift highlights — use a clean, damp brush to lift pigment for soft, gentle glows or rim lighting. These coloring methods for artists give a painterly yet controlled look that combines the precision of pencils with the fluidity of watercolors. They are wonderful for floral, landscape, and botanical designs. To improve coloring skills with this medium, practice on small test swatches first — watercolor pencils behave differently depending on paper texture and water amount. Try them on our Nature Bliss Coloring Pages – Relaxing Floral & Leaf Designs for Mindful Coloring or 15 Sakura Coloring Pages – Japanese Spring Coloring Book with Cherry Blossom Zen Florals.
Q15: How can I improve coloring skills using only free resources?
A: You can make dramatic progress in how to improve coloring skills using only free or very low-cost resources by following this system:
- Daily 20–30 minute drills — use free printable samplers (our site offers several: 5 free mandalas, 3 free fall leaves, 3 free Christmas designs, etc.) for targeted practice on one technique (strokes, blending, pressure, texture).
- Before/after photo journal — photograph every finished section under the same lighting; review weekly to spot progress in coloring techniques for beginners and adult coloring techniques and tips.
- Free YouTube tutorials — channels like Lisa Ann Watkins, Color with Kim, or Art ala Carte offer excellent breakdowns of coloring methods for artists (search “beginner colored pencil blending” or “advanced fur coloring”).
- Online communities — post work in free groups (Reddit r/Coloring, Facebook adult coloring groups) and politely ask for constructive feedback — this accelerates how to improve coloring skills faster than solo practice.
- Our free guides & samplers — use articles like Beginner Coloring Techniques, 5 Free Mandala Coloring Pages, and seasonal freebies to practice without spending money. Most people who follow this free routine see clear improvement in even coverage and blending within 3–4 weeks, and noticeable depth and personality in 2–3 months. Consistency matters more than expensive supplies when learning beginner-level coloring techniques and building toward advanced techniques.
Before diving into specific techniques, make sure you have the right tools — see our complete coloring tools guide
The progression from beginner to advanced techniques is well-structured. I can see my improvement over time.
Finally, a guide that doesn’t talk down to beginners but also offers depth for experienced colorists.
The printability of these files is excellent. No blurry edges or misaligned lines — they come out crisp every time.