Mastering Coloring Book Techniques: Blending, Shading & Layering Tips
- Blending creates smooth color transitions using circular motions, solvents, or layering techniques.
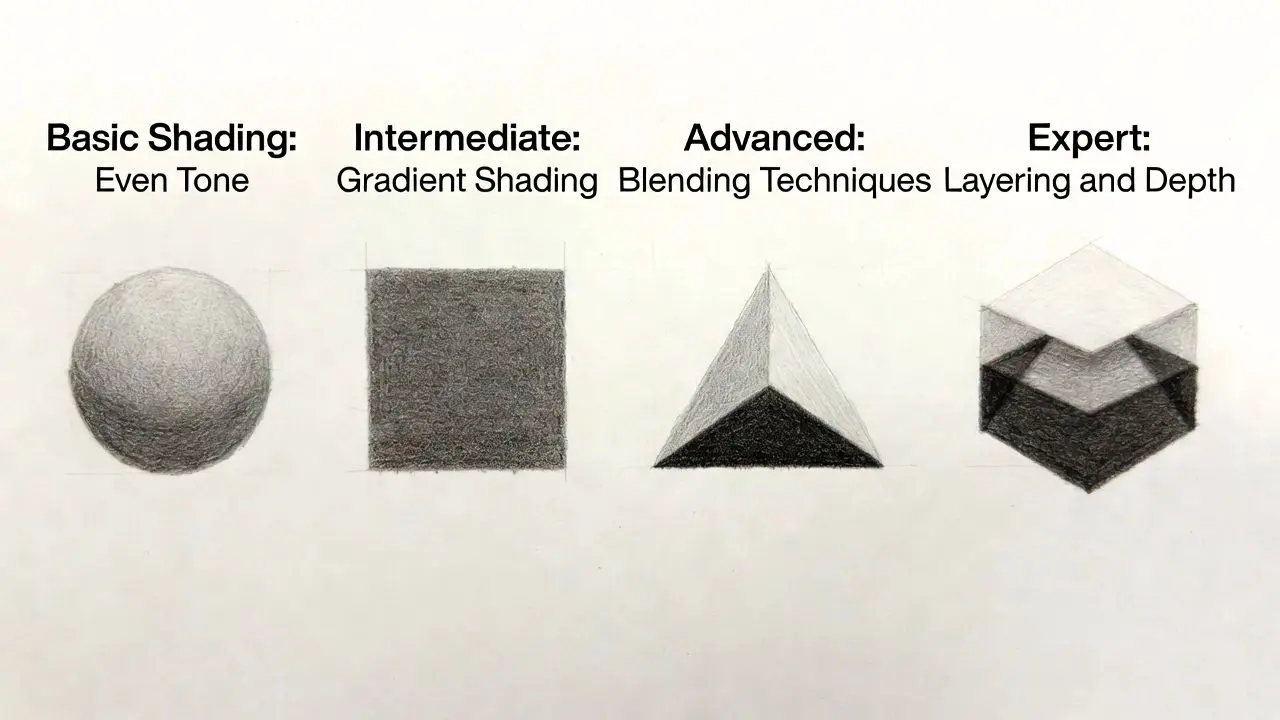
- Shading adds depth and dimension through changes in value, directional strokes, and understanding the light source.s
- Layering builds rich color by applying multiple light layers rather than applying heavy pressure.
- Color selection impacts final results – warm colors advance, cool colors recede.
- Practice on simple designs before tackling intricate patterns
Introduction to Professional Coloring Book Techniques
Whether you’re just beginning your coloring journey or looking to elevate your skills, mastering essential coloring book techniques transforms ordinary pages into stunning works of art. The difference between amateur coloring and professional-looking results often comes down to three fundamental skills: blending, shading, and layering.
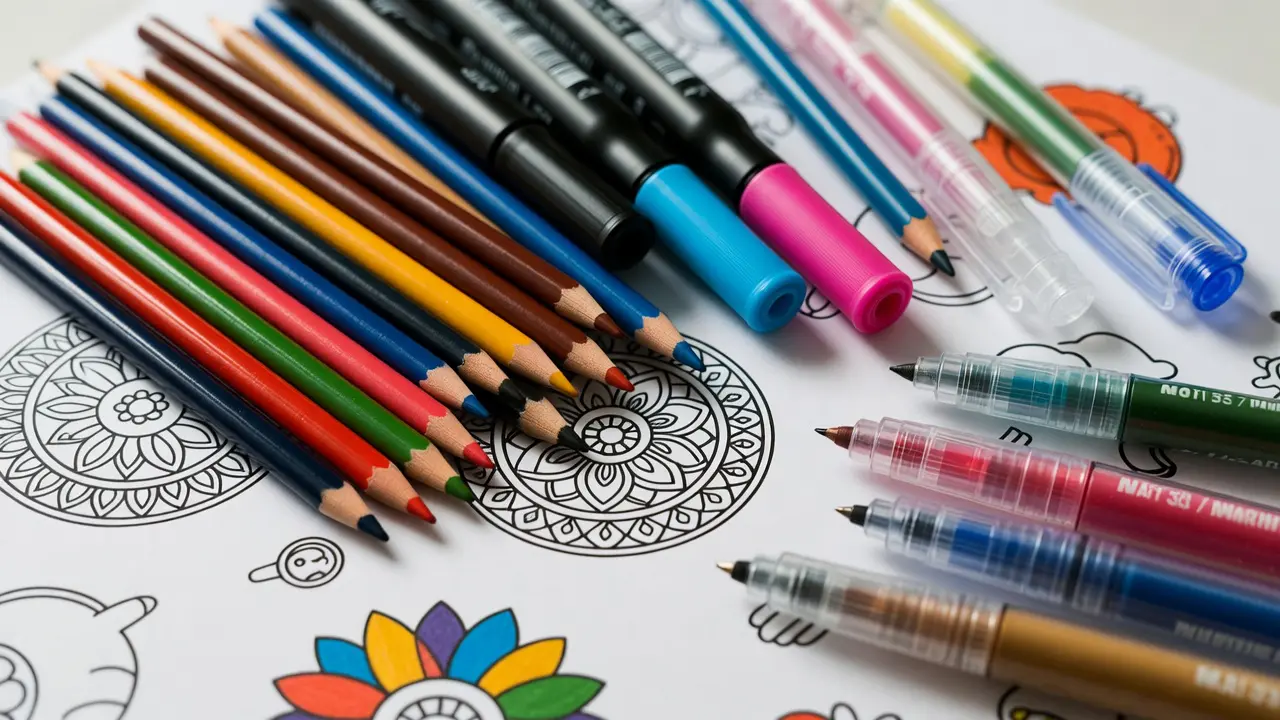
Understanding how to color coloring books properly isn’t just about staying within the lines—it’s about bringing images to life with depth, dimension, and visual interest. These colouring techniques work across all mediums, whether you prefer colored pencils, markers, gel pens, or crayons.
In this comprehensive guide, you’ll discover proven methods to improve your coloring, from basic color blending techniques to advanced shading methods that create realistic three-dimensional effects. Let’s explore how these techniques can transform your coloring experience.
Blending Basics
- Use light, circular motions for seamless transitions
- Overlap colors slightly for smooth gradients
- Colorless blender pencils work magic for colored pencils
- Blending stumps creates professional results
Mastering Color Blending Techniques
Understanding Color Blending Fundamentals
Color blending techniques create smooth transitions between hues, eliminating harsh lines and creating professional-looking gradients. The key to successful blending lies in patience and light pressure—never rush the process or press too hard initially.
The Circular Motion Method
The most effective way to blend colors involves small, circular motions that overlap adjacent areas. Start with your lighter color and apply gentle pressure in small circles. As you approach the area where you want to transition to a second color, begin incorporating the new shade while gradually reducing the intensity of the first color.
Layering for Seamless Blends
Building colors with multiple light layers creates more vibrant, controllable blends than single, heavy applications. Apply your first color lightly across the entire area, then add subsequent layers, varying pressure to create natural-looking transitions. This technique works especially well with colored pencils and allows for greater color control.
Tool-Assisted Blending
Specialized tools can enhance your color blending techniques:
- Colorless blender pencils: Perfect for smoothing colored pencil applications without adding new pigment
- Blending stumps: Paper tools that smooth and merge colors effectively
- Cotton swabs: Budget-friendly option for small areas
- Blending markers: Alcohol-based markers designed specifically for seamless transitions
- Solvents: Odorless mineral spirits or baby oil can blend oil-based pencils beautifully
For those exploring different styles and levels of complexity, techniques for fine-detail coloring offer specialized approaches for intricate designs that require precise blending in tight spaces.
Not sure how to actually use your new supplies? Our beginner’s guide to coloring techniques walks you through the first steps, from pressure control to shading basics.
Professional Shading Techniques That Add Depth
Understanding Light and Shadow
Shading techniques transform flat images into three-dimensional masterpieces by creating the illusion of depth, volume, and form. Before applying any shading, identify your light source—this determines where highlights and shadows fall.
Directional Shading Methods
The direction of your strokes significantly impacts the final appearance:
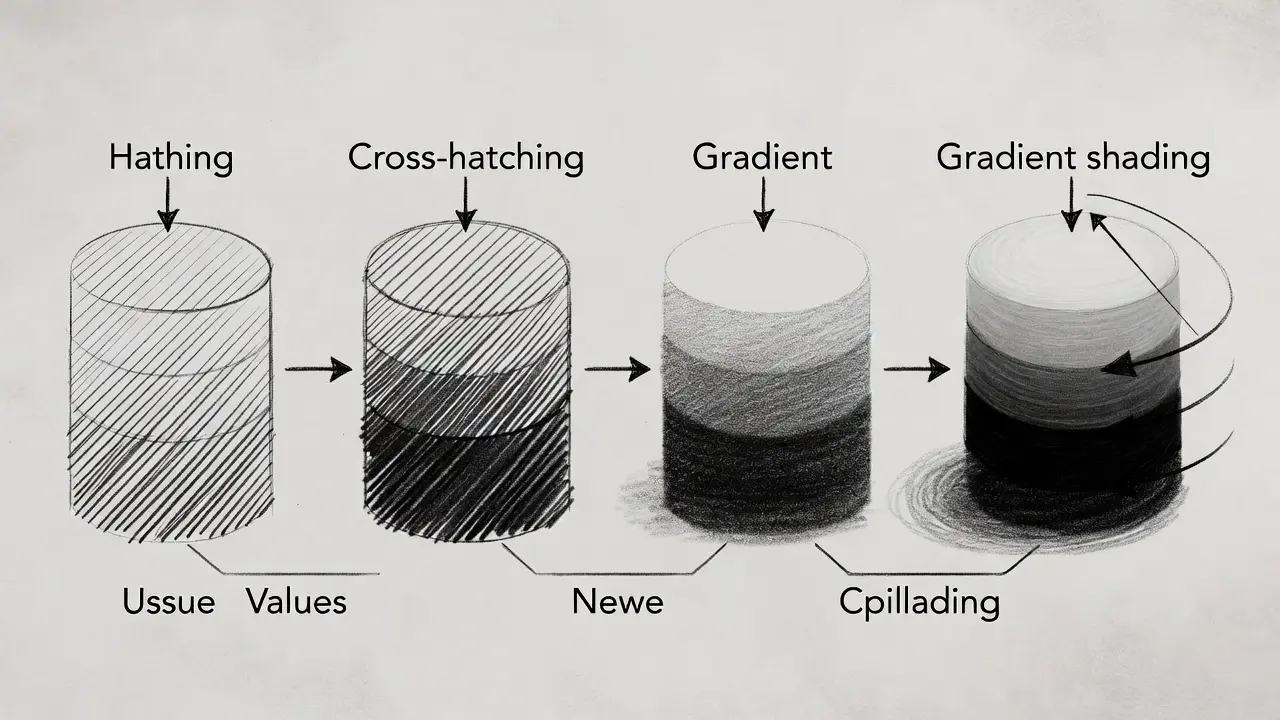
- Hatching: Parallel lines create subtle shadows and texture
- Cross-hatching: Overlapping perpendicular lines build darker values
- Circular shading: Small circles create smooth, even tones
- Directional strokes: Follow the contour of objects for a natural-looking form
Value Gradation
Creating smooth transitions from light to dark requires understanding value scales. Practice creating gradients that smoothly transition through at least five distinct values—from pure white to deep shadow. This control allows you to convincingly represent subtle curves, folds, and three-dimensional forms.
Strategic Shadow Placement
Shadows appear in three key areas:
- Cast shadows: Dark areas where objects block light completely
- Core shadows: The darkest part of an object, opposite the light source
- Form shadows: Gradual darkening that defines rounded surfaces
Understanding these shadow types helps you determine where to apply your darkest values and where to keep areas light.
Advanced Shading for Realistic Effects
Taking your shading techniques to the next level involves understanding reflected light—the subtle illumination that bounces into shadow areas. This prevents shadows from appearing completely black and adds realism to your work.
For beginners looking to practice these skills with appropriate designs, beginner coloring books feature simpler shapes and patterns that make it easier to learn shading fundamentals before tackling complex illustrations.
- Always start with the lightest colors first
- Build intensity gradually through multiple passes
- Allow each layer to “settle” before adding more
- Light pressure prevents waxy buildup and paper damage
The Art of Layering for Rich, Vibrant Colors
Why Layering Outperforms Heavy Pressure
One of the most transformative coloring book techniques you can master is proper layering. Instead of pressing hard to achieve intense colors, building multiple light layers produces richer, more controllable results with better blending capabilities and less paper damage.
The Layering Process Step-by-Step
How to color coloring books using professional layering methods:
- Start light: Apply your first layer with barely any pressure, creating a translucent wash of color
- Assess coverage: Evaluate the color intensity before adding more
- Build gradually: Add subsequent layers, slowly increasing pressure with each pass
- Vary direction: Change stroke direction between layers for more even coverage
- Finish strong: Use slightly more pressure on the final layers for saturation
Color Layering Combinations
Creating complex colors through layering expands your palette beyond your pencil collection. Try these effective combinations:
- Warm browns: Layer orange over red, then add yellow highlights
- Rich purples: Blue base with red or magenta layers
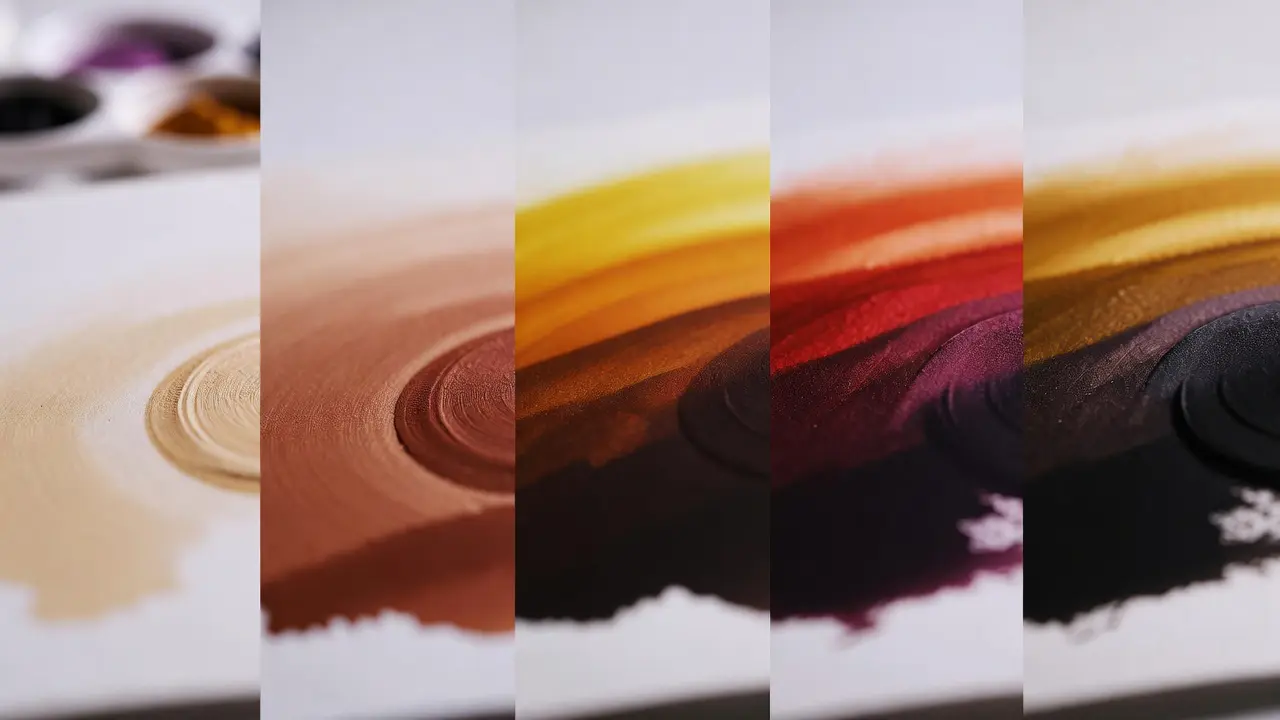
- Realistic skin tones: Peach base, light pink layers, beige accents
- Deep greens: Blue foundation with yellow and dark green layers
- Vibrant shadows: Layer complementary colors in shadow areas for depth
Test your palette digitally before committing it to paper
Medium-Specific Layering Techniques
Different coloring mediums require adapted approaches:
Colored Pencils: The ideal medium for layering, allowing infinite layers with proper technique. Wax-based pencils blend smoothly but can create waxy buildup; oil-based pencils layer with less bloom but require more pressure.
Markers: Require fast layering while the ink remains wet. Use lighter colors first, as dark markers will bleed through lighter ones. Alcohol markers excel at layering and blending.
Gel Pens: Limited layering capability; focus on strategic placement rather than building layers. Allow each layer to dry completely before adding more.
When working with detailed botanical designs, combining these techniques creates stunning results. Collections like printable wildflower coloring pages benefit immensely from proper layering and blending to capture the delicate nature of petals and leaves.
New to coloring altogether? Start with our beginner’s guide to coloring techniques to build a solid foundation before experimenting with blending.
Choosing the Right Medium for Your Technique
Colored Pencils: The Versatile Champion
Colored pencils offer the most control and versatility for all colouring techniques. They excel at fine details, subtle blending, and building complex layers. Quality matters significantly—artist-grade pencils contain more pigment and blend more smoothly than student-grade options.
Improve layering skills while working through 60 Fashion Coloring Pages for Adults – Calm Creative Time pages with elegant outfits and textures.
Types of Colored Pencils
- Wax-based: Smooth application, excellent blending, risk of wax bloom
- Oil-based: Harder core, clean colors, less bloom, require more pressure
- Watercolor pencils: Dual-purpose for dry and wet techniques
Practice these techniques with Bold and Easy Coloring Pages
Markers: Bold and Vibrant
Markers deliver saturated colors quickly but require different shading techniques than pencils. Alcohol-based markers blend beautifully and dry quickly, while water-based markers are more economical but may cause paper warping.
Marker Techniques
- Flicking: Quick strokes create texture and movement
- Feathering: Light, overlapping strokes blend colors
- Circular blending: Merge colors while the ink is wet
Gel Pens: Details and Highlights
Gel pens add brilliant highlights, fine details, and metallic accents that other mediums can’t achieve. They work beautifully over colored pencils for finishing touches, but have limited blending and shading capabilities.
Combining Mediums
Advanced colorists often combine mediums for the best results: colored pencils for shading and details, markers for large areas, and gel pens for highlights. This approach leverages each medium’s strengths while minimizing weaknesses.
Color Theory Basics for Better Results
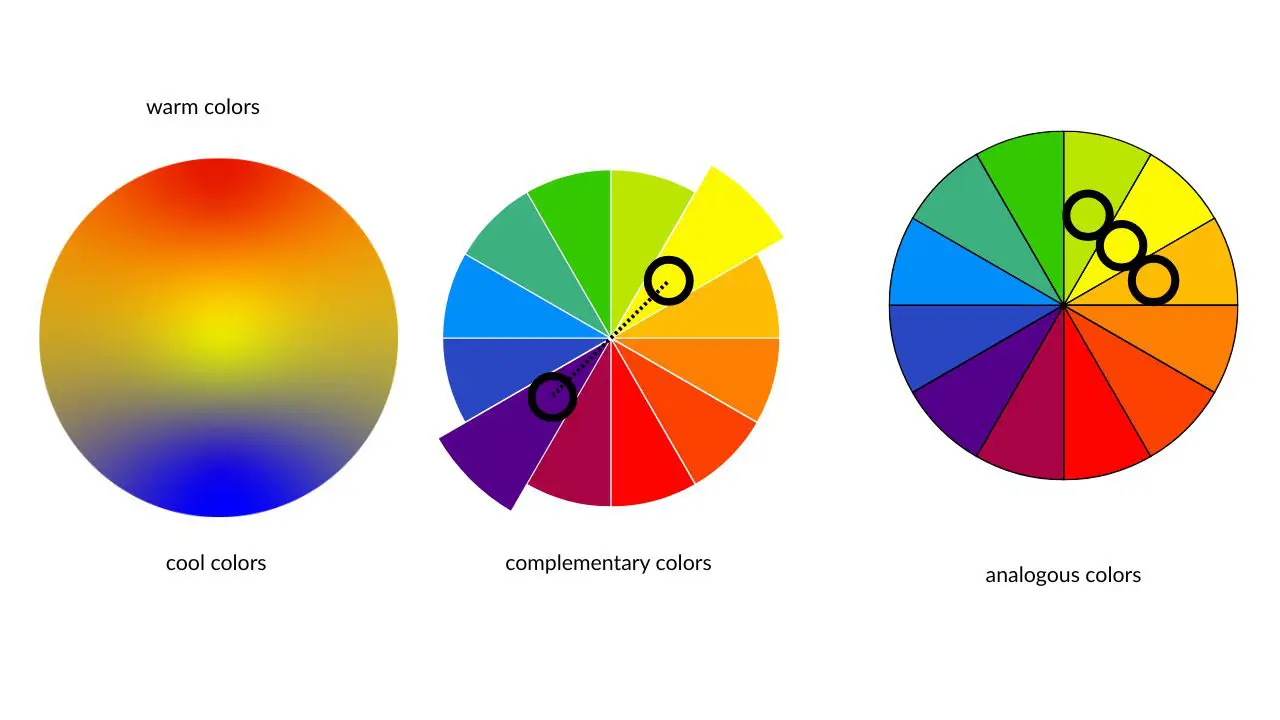
Understanding the Color Wheel
Applying color blending techniques effectively requires a basic understanding of color theory. The color wheel shows relationships between colors that help create harmonious or dramatic effects.
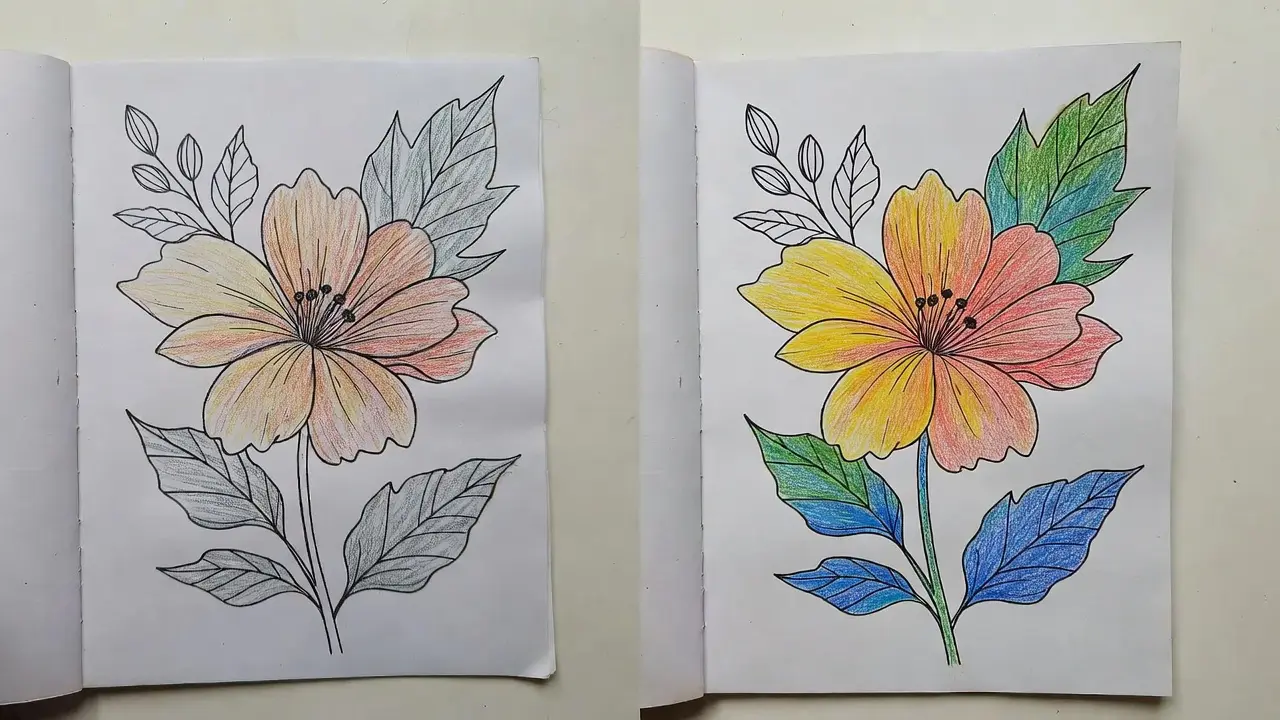
Learn why blending warm into cool creates natural-looking depth.
Key Color Relationships
- Complementary colors: Opposite on the wheel (red/green, blue/orange) create vibrant contrasts
- Analogous colors: Adjacent colors (blue, blue-green, green) blend smoothly
- Triadic colors: Three equally spaced colors create balanced, dynamic combinations
Warm vs. Cool Colors
Warm colors (reds, oranges, yellows) advance visually and create energy, while cool colors (blues, greens, purples) recede and create calm. Use this principle in your shading techniques—warm shadows suggest warmth, cool shadows suggest coolness or distance.
Creating Depth with Color Temperature
Layer warm colors in foreground elements and gradually introduce cooler tones toward the background. This atmospheric perspective creates realistic depth in landscape scenes and complex compositions.
Common Mistakes to Avoid
- Don’t press too hard initially—build pressure gradually
- Avoid coloring too fast—patience creates better blends
- Don’t skip test swatches—preview colors before committing
- Never neglect planning your light source direction
Common Mistakes and How to Fix Them
Pressing Too Hard Too Soon
The Problem: Heavy initial pressure creates waxy buildup, makes blending impossible, and can damage paper.
The Solution: Always start with feather-light pressure. You can always add more layers, but you can’t easily remove excess pigment.
Inconsistent Stroke Direction
The Problem: Random, visible stroke marks create messy-looking results.
The Solution: Use consistent circular motions or follow the contour of the object you’re coloring. For smooth areas, maintain one direction throughout.
Ignoring White Space
The Problem: Filling every space with color eliminates highlights, resulting in flat results.
The Solution: Strategically preserve white paper for the brightest highlights. This is especially crucial when learning how to color coloring books for realistic effects.
Recommended for This Topic
35 Bold and Easy Coloring Pages for Adults — Large Print PDF

56 Printable Mandala Coloring Pages for Adults. PDF Download
50 Geometric Coloring Pages for Adults — Printable PDF
Rushing the Process
The Problem: Impatience leads to uneven coverage, poor blending, and messy edges.
The Solution: Embrace coloring as a form of meditation. Quality results require time and patience. Put on music or a podcast and enjoy the process.
Skipping Color Testing
The Problem: Colors look different on paper than they do with a pencil or marker tip.
The Solution: Create swatches on scrap paper before committing to your design. Test layering combinations and blending techniques first.
Practice Exercises to Build Your Skills
Exercise 1: Value Scale Creation
Draw five boxes and practice creating smooth transitions from white to your darkest value using a single color. This fundamental exercise develops pressure control, which is essential for all coloring book techniques.
Exercise 2: Sphere Shading
Draw a circle and shade it to create a three-dimensional sphere. Identify your light source, add a highlight, core shadow, reflected light, and cast shadow. This exercise combines multiple shading techniques into a single project.
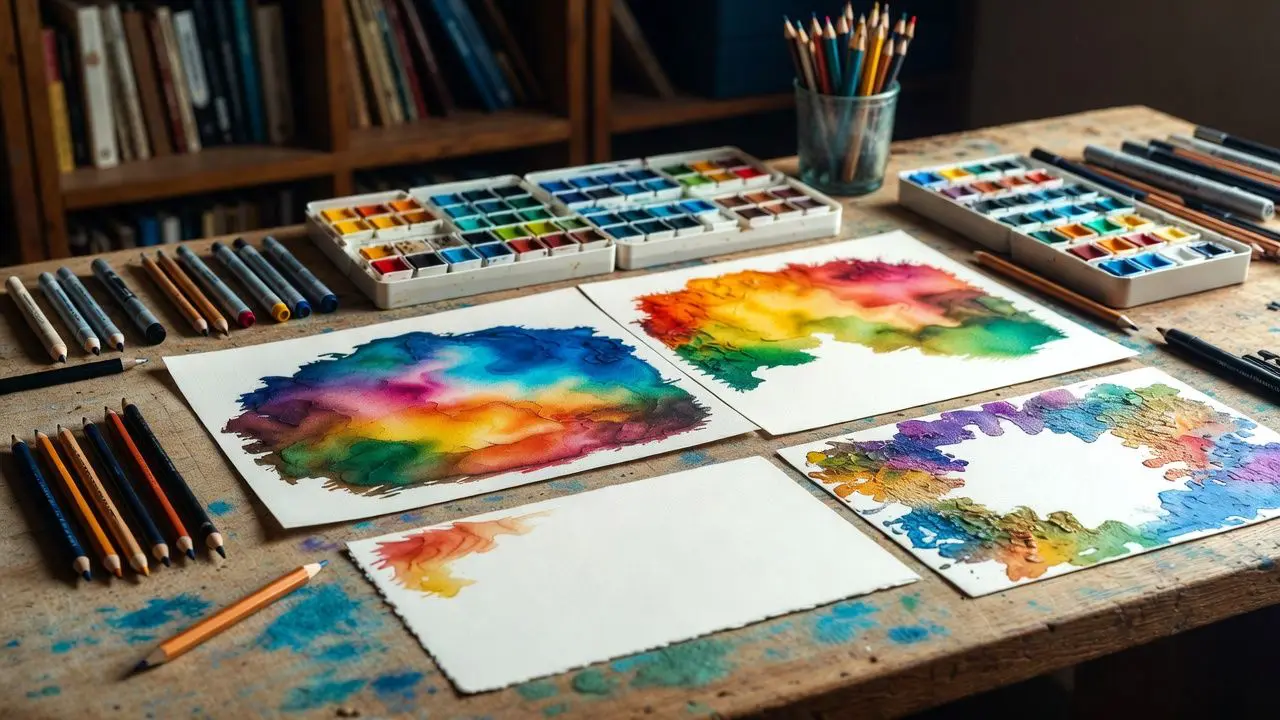
Exercise 3: Color Wheel Blending
Create a color wheel by blending primary colors into secondary and tertiary colors. This develops your understanding of color blending techniques and color relationships simultaneously.
Exercise 4: Texture Studies
Practice creating different textures—wood grain, fur, fabric, metal—using various stroke techniques. Each texture requires different approaches to layering and shading.
Exercise 5: Simple Object Studies
Color simple objects from life—an apple, a mug, a flower. Real objects teach you about natural light, shadow, and color, which translates directly tintocoloring books mthat look ore rrealistic
Advanced Techniques for Stunning Results
Burnishing for Smooth Finishes
Burnishing creates a smooth, almost painted appearance by applying heavy pressure with a light-colored pencil (often white or cream) over existing layers. This technique blends colors seamlessly and creates a professional, polished finish.
How to Burnish Effectively
- Complete all your color layering first
- Select a light-colored pencil (white, cream, or light gray)
- Apply firm pressure, using circular motions over the colored area
- The colors will blend and appear more vibrant
- Continue until you achieve a smooth, waxy finish
Lifting and Erasing Techniques
While you can’t completely erase colored pencil, strategic lifting creates highlights and corrections:
- Kneaded erasers: Gently dab to lift light layers
- Tape lifting: Press low-tack tape onto a wax-based pencil to remove pigment
- Electric erasers: Precisely remove small areas for fine highlights
Creating Texture and Pattern
Advanced colouring techniques include creating visual texture through deliberate mark-making:
- Stippling: Tiny dots create texture and gradation
- Scumbling: Random, scribbled marks suggest organic textures
- Impressing: Press lines into paper before coloring to create white patterns
- Sgraffito: Scratch through layers to reveal underlying colors
Underpainting Techniques
Professional colorists often apply a light base layer in a complementary color before adding final colors. For example, a light blue underpainting beneath warm oranges and reds creates vibrant, complex shadows with depth.
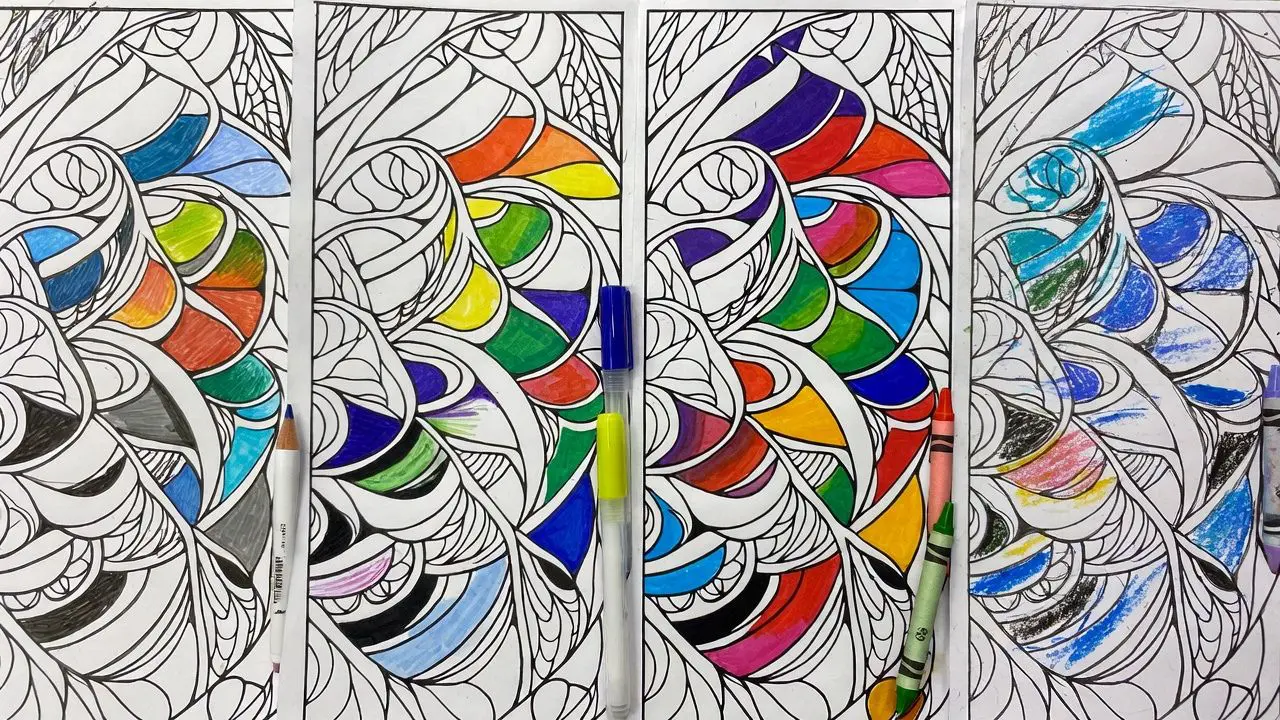
These advanced methods work beautifully on detailed designs. For those ready to challenge themselves, intricate options like printable mandala coloring sheets offer ideal opportunities to practice precision blending and shading within complex, symmetrical patterns.
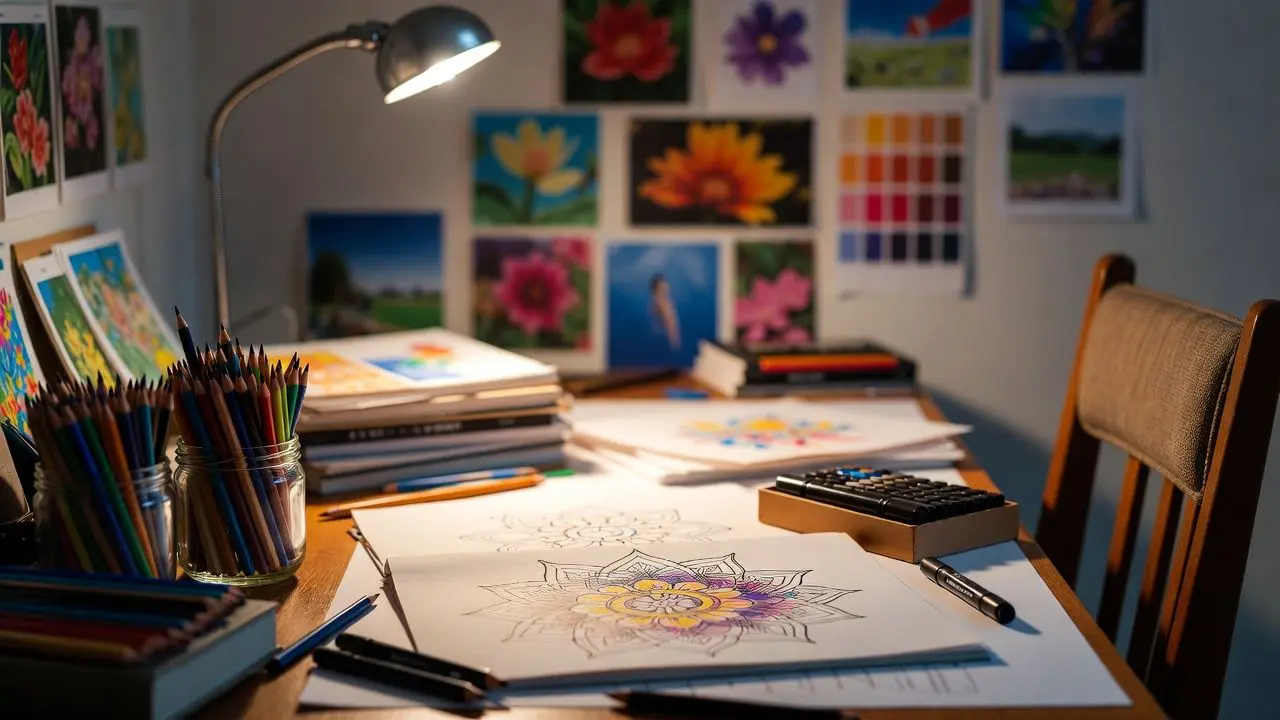
Setting Up Your Coloring Workspace
Lighting Matters
Proper lighting prevents eye strain and ensures accurate color selection. Natural daylight is ideal, but if that’s not available, use daylight-balanced LED lamps. Avoid yellow-tinted bulbs that distort color perception.
Ergonomic Considerations
Comfortable seating and proper posture prevent fatigue during longer coloring sessions. Position your work at a slight angle using a slant board or by propping it up on books. This reduces neck strain and improves visibility.
Organizing Your Supplies
Keep frequently used colors easily accessible. Many colorists organize pencils by color family rather than numerically, making it easier to find the perfect shade when blending. Storage solutions such as pencil wraps, stands, and cases protect your investment and save time.
Reference Materials
Keep color swatches, a color wheel, and blending reference charts nearby. Real-world photo references help with realistic shading and color choices, especially when coloring natural subjects like flowers or animals.
Conclusion: Your Journey to Mastery
Mastering coloring book techniques transforms a simple hobby into a sophisticated art form. Whether you’re perfecting color blending techniques, exploring new shading techniques, or discovering innovative ways for coloring coloring books, remember that skill develops through consistent practice and experimentation.
Start with basic exercises, gradually incorporating more advanced colouring techniques as your confidence grows. Don’t be afraid to make mistakes—they’re essential learning opportunities. Each completed page strengthens your understanding of how colors interact, how light creates form, and how layering builds depth.
The beauty of adult coloring lies not just in the finished product but in the meditative process itself. As you develop your technical skills, you’ll find that the time spent coloring becomes increasingly rewarding, both creatively and therapeutically.
Gather your supplies, choose a design that inspires you, and begin practicing these techniques today. With patience, practice, and the methods outlined in this guide, you’ll soon create coloring book pages that rival professional illustrations. Happy coloring!
Frequently Asked Questions: Coloring Techniques
Q1: What are the best coloring book techniques for beginners?
A: The best coloring book techniques for beginners include hatching, circular strokes, and layering. Start by applying light pressure with your colored pencils to build color gradually. Hatching uses parallel lines to create texture, while circular strokes fill areas smoothly without streaks. Layering — adding multiple light coats of color — gives you richer, more vibrant results than pressing hard in a single pass. These colouring techniques work equally well with markers or pencils and are easy to practice on any coloring page.
Q2: How do I color coloring books without streaks or uneven patches?
A: To color coloring books without streaks, always work in small, consistent strokes and apply multiple thin layers rather than one heavy coat. With colored pencils, use a light hand and build up color gradually in the same direction as your strokes. With markers, work quickly while the ink is still wet to blend edges before they dry. Choosing quality paper also helps — thicker pages absorb color more evenly and prevent bleed-through.
Q3: What colored pencil coloring techniques make artwork look professional?
A: The colored pencil coloring techniques that give artwork a professional finish are burnishing, blending, and color layering. Burnishing means pressing a light-colored pencil or a colorless blender firmly over your existing layers to smooth everything into a polished, almost painted look. Layering complementary colors — for example, adding a cool blue shadow beneath a warm yellow — creates depth and dimension. Using a blending stump or tortillon can also soften harsh lines and transitions, resulting in a cleaner look.
Q4: What is the difference between hatching and blending as colouring techniques?
A: Hatching and blending are two distinct colouring techniques used to create different visual effects. Hatching uses fine parallel or cross-hatched lines to build up tone and texture — it’s ideal for adding shading and a hand-drawn feel. Blending, on the other hand, merges two or more colors smoothly so no visible line exists between them, creating gradients and soft transitions. Most colorists use both: hatching for detail and texture, blending for backgrounds and smooth skin tones.
Q5: How do I use layering as a coloring book technique?
A: Layering is a coloring book technique where you apply multiple light coats of color on top of each other to build depth and richness. Start with the lightest color in your palette and apply it across the entire area with gentle pressure. Then add a mid-tone, focusing on shadow areas. Finally, deepen the darkest zones with your deepest shade. Each layer should be applied lightly so the paper texture still grips the next coat. This method works especially well with colored pencil coloring techniques and produces results far more vibrant than a single heavy application.
Q6: Can I mix markers and colored pencils when coloring coloring books?
A: Yes — combining markers and colored pencils is one of the most effective coloring book techniques for achieving rich, detailed results. Use alcohol-based markers first to lay down a smooth, vibrant base color quickly. Once dry, go over the top with colored pencils to add shading, texture, and fine detail that markers alone can’t achieve. The pencil pigment adheres well to the marker layer, making blending and burnishing easier. This mixed-media approach is popular among adult coloring enthusiasts for its flexibility and professional-looking finish.
As a parent, this is exactly what I needed for family activities. Highly recommend! The images are stunning too!
The tips on blending and shading have transformed how I approach my coloring projects. So helpful!
The section on layering with colored pencils finally made blending click for me. I’ve read so many guides, but the way it was broken down here was refreshingly clear.
Didn’t expect to learn something new from a beginner tutorial, but the tip about burnishing at the end was genuinely useful.